As a home inspection professional, it’s essential for us to keep updated on the latest home inspection trends, codes, and best practices and find new sources for reference, education, and inspiration while staying connected to other professionals.

To stay current, we use various online and offline sources to provide the latest in home inspection services to our clients and to strengthen our business relationships. These tools allow us to provide exceptional service to all our clients, ensuring they receive the most up to date and comprehensive home inspections.

We’ve gathered six of our most commonly referenced guides, charts, and books for your use. No matter if you’re a seasoned real estate professional, a first-time home buyer, or a home owner thinking about selling, there is probably some value for everyone. Take a look.

1. EPA’s Home Buyer’s & Seller’s Guide To Radon

The EPA’s Home Buyer’s & Seller’s Guide To Radon answers essential questions about radon and lung cancer risk, as well as answering questions about testing and mitigation for anyone buying or selling a home. With Minnesota radon levels averaging 3-times greater than the national average, this is a very helpful document to help guide anyone towards making smart decisions about radon in our homes.

2. Standard Life Expectancy Chart for Homes

The Standard Life Expectancy Chart for Homes details the predicted average life expectancy of appliances, products, materials, systems, and components. An excellent reference tool for homeowners and buyers.

3. Minnesota Well Owner’s Handbook

The Minnesota Well Owner’s Handbook contains information you should know about Minnesota’s groundwater, well construction/protection, well operation/maintenance, and well water safety/testing. A fantastic tool for many of our more rural clients with a well.

4. DCA-6 Residential Deck Construction Guide

The DCA-6 Residential Deck Construction Guide is a prescriptive guide for the do’s and don’ts of residential deck construction. There is a right and wrong way to build a deck. Do you know how? Issues related to poor, improper, or unsafe deck construction are one of the most common deficiencies we make note of in our inspection reports. We recommend using this as a reference for anyone thinking about constructing or maintaining a deck!

5. Sellers Home Inspection Checklist

Having your home inspection ready for potential buyers helps promote a sense of confidence and comfort, which can increase the likelihood of a smooth path to closing. We’ve created the Sellers Home Inspection Checklist to help sellers out!

6. InterNACHI Certified home inspectors

As InterNACHI Certified home inspectors, we spend many hours each year refreshing ourselves on various aspects of home inspections, as well as broadening our knowledge. Many InterNACHI courses can be accessed for free, so visit the website to learn more.

If you’re planning a home inspection soon, these resources can be a great starting point. When you’re ready to take the next step, reach out to Due North Property Inspection for all your home inspection needs.

Due North Property Inspection provides full turnkey home inspection services to clients throughout the Twin Cities metro as well as St. Cloud and surrounding areas.

Our services include buyer’s pre-purchase home inspection, seller’s move-in certified pre-listing inspection, new home warranty inspections, and annual property reviews. We also offer radon testing, sewer scope inspections, and water quality tests for our clients.

We serve clients in the Greater Twin Cities and St. Cloud areas, including Saint Michael, Anoka, Blaine, Bloomington, Brooklyn Park, Burnsville, Champlin, Chanhassen, Eden Prairie, Edina, and Maple Grove. To learn more, please visit our website or contact us.

When you find yourself in a competitive multiple offer scenario and are looking to present a winning purchase offer, it may be tempting to remove any contingencies such as your buyers right to a home inspection because you feel it may deter the seller. Rather than incurring the risks associated with that, I am offering a couple strategies that have worked for some of our agent partners to maintain your clients right to perform a home inspection while still presenting an attractive and aggressive offer.

#1 Shorten Your Inspection Window

We work with multiple agents that have been successful having their offers accepted in competitive situations while maintaining the right to perform a home inspection all by shortening the inspection window. Presenting a 5-day, or even 3-day inspection window can be much less daunting for a seller when all other aspects of your offer are what they want to see. How do you do this?

  • Maintain a strong working relationship with two 5-star inspection companies. They should know who you are, and you should be comfortable with their level of service. A good inspector understands the challenges you face in a multiple offer scenario and will be happy to be flexible with your needs.
  • Communicate in advance and book your inspection as soon as your offer is accepted. If your inspector knows you are submitting a purchase offer and that you will need a quick-turn inspection in the next few days, they may be willing to hold a spot in their schedule for you. The ability to schedule your inspection online 24/7 is another service to look for. Purchase offers are presented and accepted at all hours of the day. Make sure your inspector can get the ball rolling no matter the time of day as soon as your offer is accepted.
  • Work with an inspector that sends out the inspection report same day!  With the inspection software and tools available today there really is no good reason why your inspector should not be able to get your report to you same day. If you are having to wait a day or more, it might be time to reevaluate inspectors.


#2 Perform A ‘Walk-n-Talk’ Inspection 

For scenarios where it is impossible to request a full home inspection, and you’re certain any contingencies will be a deal breaker, we do offer agent partners the ability to schedule a Walk-n-Talk inspection. A Walk-n-Talk inspection is an abbreviated 90-minute inspection that is really focused on finding any MAJOR deficiencies within a home. There is no report associated with this type of inspection, so note taking and pictures are the responsibility of the buyer or agent. Again, this is not a substitute for the quality and thoroughness of a full home inspection and should only be used in the right situations. These inspections are typically performed during a second showing so the buyer can present a non-contingent offer with some degree of comfort knowing they are not purchasing a complete headache or money pit.

I hope this gives you a couple ideas to consider in competitive multiple-offer scenarios that will allow you to protect your clients with a home inspection and still present the winning offer! We’re here to help.

Due North Property Inspection is a full-service 5-star inspection company offering home inspectionsradon testing, and sewer scope inspections to clients throughout the Twin Cities and central Minnesota.

With over 90% of home sales involving a home inspection (source: ASHI), it’s probably safe to say that home buyers recognize the value and power in having their new home inspected as part of their buying process. Just as important as it is to have your new home inspected, it is equally essential that you hire the right professional for the job. With a seemingly daunting number of home inspectors to choose from, we put together a list that will help you weed out the best from the rest so your home inspection can be a positive experience and truly helpful in making significant decisions. Here is our top five list of considerations.

1. Is Your Home Inspector Certified?
In Minnesota, as with many states, home inspectors are not licensed by the state. So, before hiring a home inspector, look to make sure they are certified by a nationally or internationally recognized association. Being certified means that your home inspector is adequately trained, follows an industry-accepted standard of practice, and adheres to a specific code of ethics. A certified inspector will be able to provide you with a comprehensive report and communicate clearly in straight-forward terms to help you make significant decisions when buying a new home.

The two primary industry associations that offer home inspector certifications are InterNACHI, the world’s largest property inspector organization, and ASHI, one of the oldest home inspection organizations in the nation. Both are great!

2. What Are Past Clients Saying About Them?
Dig into customer reviews online to see what other clients have said about the home inspector you want to hire. Are the reviews positive? Does it seem like the inspector is reputable? Check on Google and Facebook, or anywhere else you can find them, as people tend to leave reviews when they are pleased with the service they received or upset and disappointed with their experience. It is usually wise to give weight to positive customer reviews, as you are more likely to have a similar experience.

3. What Do Their Inspection Reports Look Like?
Look for an inspector who has a link on their website, sharing sample inspection reports to give you an idea of what to expect. Top-quality reports from A-List home inspectors will be in-depth and include many high-resolution images, videos, and descriptions of how different areas of the home are inspected and what deficiencies were found. Modern reports will be optimized to be viewed and accessed from anywhere via smartphone or PC.

Low-quality reports will look and feel outdated and may not provide the same level of detail as a top-quality report.

While that doesn’t necessarily mean it’s a lesser report, it can have a big impact on how you, the client, can interact with, digest, and share portions of the entire report.

4. What Kind of Services Do They Offer?
A good percentage of today’s home buyers look for add-on services in addition to their Pre-Purchase home inspection. Radon testing and sewer scope inspections are the most common in Minnesota. If these services are of interest to you, does your inspector offer these services as well? If not, you may need to schedule these additional services with other providers, which can be inconvenient.

If you are looking to buy a townhome or condo, does your inspector offer ‘Interior-Only’ inspections? Most townhome communities and condo buildings are managed by a Homeowners Association (HOA). The HOA is typically responsible for maintaining most exterior and shared elements of the home/community/building. In most cases, it does not make sense to pay a home inspector to inspect these elements. To be blunt – only pay for what you need and avoid a ‘one size fits all’ inspector.

5. Are They Personable and Do They Offer a High Level of Customer Service?
Everyone appreciates a service professional that is responsive, polite, knowledgeable, and accessible. For this reason, look for the basics. Do they answer the phone right away or call back promptly? Do they respond to emails quickly, and are they clear in their communication? Do they make themselves available for questions or conversations before, during, and or after the inspection?

Purchasing a home is a significant event in your life. You need to make sure you partner with professionals that want to help make your home inspection a positive experience.

If you’re looking for a Minnesota home inspector in the Saint Michael-Albertville area, Twin Cities suburbs, or greater St. Cloud area, reach out to us at Due North Property Inspection.  We are certified, customer-focused, and passionate about inspecting homes and helping clients.

To learn more about the services I offer, please click here. To get in touch with me, please click here.

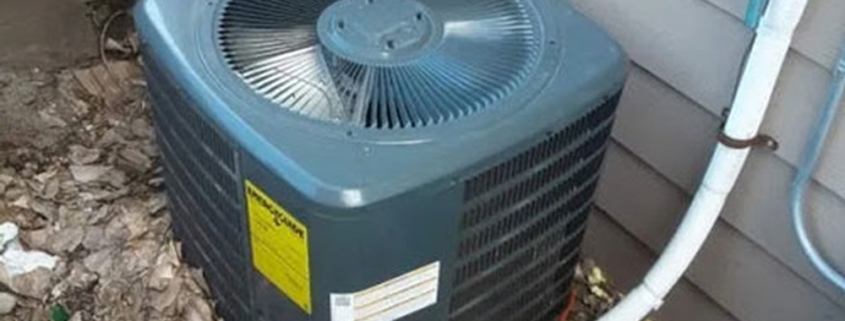
It’s May in Minnesota, and while we’ve had a few warm days already, the real heat is yet to come. To help make sure you’re ready for Minnesota’s heat and humidity this summer, we’ve put together a short checklist for you to make sure your A/C is ready when you need it.

  • Make sure the outside Air Conditioning (A/C) unit is clear of any debris to allow for proper airflow through the unit. (leaves, grass clippings, cottonwood seed…)
  • Check your furnace filter and replace if necessary.
  • When the outdoor temperature gets above 60 degrees for 2-3 days in a row, test your A/C unit by turning your thermostat to COOL mode and adjust the temp setting to below room temperature (There may be a 3-5 minute delay). Make sure the furnace fan and the outdoor unit turn on and cool air is blowing out of your vents after about 3-5 minutes. If the A/C fails to start, check your A/C breaker in the electrical panel.
  • If you have a whole house humidifier mounted on your furnace, turn the damper to the summer setting and turn the humidifier control OFF. (Set a reminder in your phone to turn it back on next winter.)
  •  If you hear any unusual noises, notice water under your furnace, or if the system will not come on and blow cold air, call your local HVAC company to have it serviced.

Here’s to a long, HOT, Minnesota Summer!

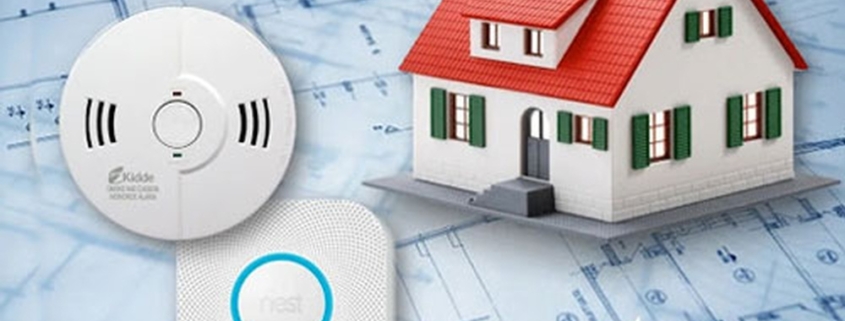
Having properly placed smoke and CO alarms throughout your house is critical to protecting your family and home.  Many homeowners are not fully aware of the types of alarms, where they need to be placed, and other information critical to keeping their family safe from fire and CO. This article will help layout the basics of what you need to know to make sure your home and family are well protected.

Types of Smoke Alarms

When it comes to smoke detection, there are three different types of alarm technologies to consider: ionization smoke alarms, photoelectric smoke alarms, and dual-sensor devices. These alarms detect the presence of smoke differently and can respond quicker to different types of fires (smoldering vs. flaming).

  • Ionization smoke alarms are generally more responsive to flaming fires.
  • Photoelectric smoke alarms are generally more responsive to smoldering fires.
  • Dual-Sensor smoke alarms are devices that contain both types of smoke detection technologies.

No one can predict the time, location, or type of fire that may start in a home. Therefore, agencies such as the USFA (U.S. Fire Administration) and NFPA (National Fire Protection Association) recommend that both ionization and photoelectric alarms be used in homes, to ensure you are alerted to all fire types.

If you had to choose just one, the IAFF (International Association of Fire Fighters) and ASHI (American Society of Home Inspectors) suggest that there is good reason to encourage the use of photoelectric smoke sensing technology over ionization or dual-sensor. Their recommendations are due primarily to homeowners disabling the batteries in ionization or dual-senor alarms because of nuisance/false alarms. Photoelectric alarms are significantly less prone to nuisance/false alarms and therefore are less likely to be disabled by annoyed homeowners.

Smoke Alarm Placement

“The location of a smoke alarm within a home may be more important than the type of smoke alarm present, depending on the fire.” – U.S. Fire Administration

For residential houses, NFPA 72 – National Fire Alarm and Signaling Code has set the standard for the placement of fire alarms within the home. At a minimum, smoke alarms are required to be installed inside every bedroom, in addition to outside each sleeping area and on every level of the home. It’s important to note that homes built to earlier standards often do not meet these minimum requirements. Existing and soon-to-be homeowners should recognize that smoke and fire detection needs have changed over time and will continue to evolve. Regardless of the code that your home was built to, it is in everyone’s best interest to take proactive measures to make sure that every home has an ample amount of properly placed smoke alarms.

Minimum Smoke Alarm Requirements:

  • Install smoke alarms inside each bedroom, outside each sleeping area, and on every level of the home, including the basement.
  • On levels without bedrooms, install alarms in the living room / den / family room or near the stairway to the upper level, or both.
  • Smoke alarms installed in the basement should be installed on the ceiling at the bottom of the stairs leading to the next level.
  • Smoke alarms should be installed at least 10 feet from a cooking appliance to minimize false alarms from cooking.
  • Mount smoke alarms high on walls or ceilings (smoke rises). Wall-mounted alarms should be installed not more than 12 inches away from the ceiling (to the top of the alarm).
  • If you have ceilings that are pitched, install the alarm within 3 feet of the peak, but not within the apex of the peak (minimum four inches down from peak).
  • Don’t install smoke alarms near windows, doors, or ducts where drafts may interfere with operation.
  • Never paint your smoke alarms. This can prevent proper operation.
  • For best protection, interconnect your smoke alarms. (When one alarm sounds, they all sound)

– Interconnection can be done using hard-wiring or wireless technology

– Use alarms from the same manufacturer for interconnecting applications.
(all alarms are not compatible)

Due North recommendation:

  • At a minimum, make sure you have operating smoke detectors in all appropriate locations (listed above) throughout your home.
  • When it’s time to replace (every 10 years) or install additional smoke alarms, make the choice to use photoelectric smoke alarms.

Carbon Monoxide (CO) Alarms

Carbon Monoxide alarms alert based on the CO concentration levels in the air over time. This concentration-time function is intended to mimic the uptake of CO in the body while also preventing false alarms due to relatively common sources of carbon monoxide, such as cigarette smoke. There are four primary types of CO sensors available. They vary in cost, accuracy and speed of response.

  • Opto-chemical type sensors are used in the most cost-effective carbon monoxide alarms. The sensor uses a pad that changes colors when CO is detected. Although these detectors may be more affordable, they are known to offer limited protection. They only detect whether or not carbon monoxide is present, and offer nothing related to the actual carbon monoxide levels, leaving the homeowner uncertain as to the degree of danger.
  • Biomimetic type sensors use a combination of color-changing liquids or gel-like elements to detect carbon monoxide. Alarms that use this sensor typically last up to three years.
  • Metal-Oxide Semiconductor type sensors are created by using wired circuits to monitor carbon monoxide. Most detectors that use this sensor last up to 10 years.
  • Electromechanical type sensors are considered best-in-class and offer the most protection for homes when detecting carbon monoxide. This sensor is the dominant technology used in the US and Europe. For CO detection, the electromechanical sensor has advantages over other technologies in that it is highly accurate, requires minimal power, and has a long lifetime.

CO Alarm Placement

The statutes and codes related to CO alarm requirements vary from state to state. For the sake of this article I’m going to focus on the requirements for my home state of Minnesota. Minnesota statute states “every single family dwelling and every dwelling unit in a multi-family dwelling must have an approved and operational carbon monoxide alarm installed within ten feet of each room lawfully used for sleeping purposes.” Minnesota building code reiterates this and states “carbon monoxide alarms shall be installed outside and not more than 10 feet from each separate sleeping area or bedroom. Alarms shall be installed on each level containing sleeping areas or bedrooms.”

Minimum CO Alarm Requirements:

  • Install CO alarms outside of and not more than 10 feet from all sleeping areas

– Best placement is in the hallway or common area outside sleeping areas.
Placement in a bathroom, laundry room, or any room with a door on the
same level, even if it meets the 10 feet requirement, doesn’t work.

  • Install at least one CO alarm on every floor
  • Make sure CO alarms are at least 15 feet away from cooking or heating      appliances to prevent false alarms.
  • Don’t cover or obstruct the unit.

Due North Recommendation:

  • Install combination Smoke/CO alarms outside of but not more than 10 feet from all separate sleeping areas, and on every level of the house. Combination alarms are an easy way to satisfy one of your smoke alarm location requirements as well as a carbon monoxide location.
  • When it’s time to replace or upgrade CO alarms, make the choice to install a CO alarm with an electromechanical type sensor.

We hope this article gives you a better understanding of the types of smoke and carbon monoxide (CO) alarms available, as well as the requirements for locations throughout your home. Remember, fire and carbon monoxide don’t care when your home was built, or to what code. Take proactive steps to make sure your home and loved ones are protected.

Other Notes of Importance 

  • Replace your smoke alarms minimally every 10 years (manufacture date should be on the back of the alarm).
  • Replace CO alarms every 7 to 10 years (depending on your model) to benefit from the latest technology upgrades.
  • Test alarms once a month by pushing the test button.
  • Choose alarms that have the label of a recognized testing laboratory (ex. UL).
  • Keep manufacturer’s installation and operating manual for reference.
  • Specific to CO alarms, “installed” means that an approved CO alarm is either hard-wired into the electrical wiring, directly plugged into an electrical outlet without a switch, or, if the alarm is battery powered, attached to the wall of the dwelling.

Sites and Agencies referenced for this article: